This is an excerpt from my forthcoming book, working title: Color Knitting Patterns from the 1960s.
Here are directions on how to put a color pattern on your project. The information works for stitch patterns as well. To keep things simple, the sample project will be a simple iPad sleeve, made in two pieces and seamed on three sides.
Gauge: 5 sts per inch, 20 sts per 4”/10cm. Row gauge isn’t important, as you’ll be knitting a pice that is long enough in inches, not rows.
Finished Measurements: 8” by 10” (20cm by 25 cm) This is 40 sts wide.
Pattern: Let’s use Red Zigzag Diamonds, a pattern from my forthcoming book, Color Knitting Patterns from the 1960s. This is an all over pattern, with a 14 st repeat. Below is a copy of that pattern.
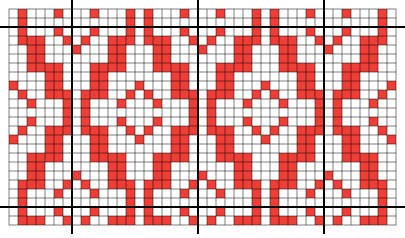
Red Zigzag Diamonds from Color Knitting Patterns of the 1960s
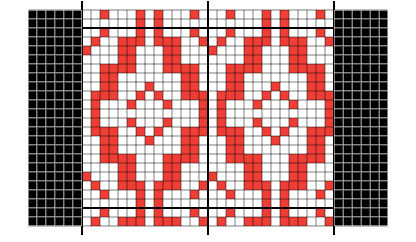
If we put 2 repeats on our cover, that uses 28 of our 40 sts, with 12 left over. The black squares are the left over stitches.
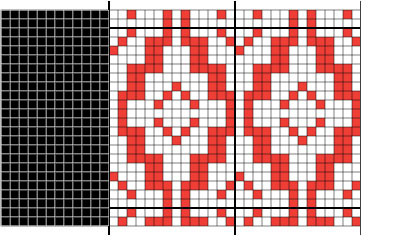
2 repeats of the 14 st pattern, plus 12 extra sts (in black)
We want our pattern centered, so we take the 12 left over stitches and divide them in half, 6 on each side.
The 12 extra sts are divided, half on each side
Now, add pattern stitches to the sides of the repeats, continuing the exact stitch pattern.
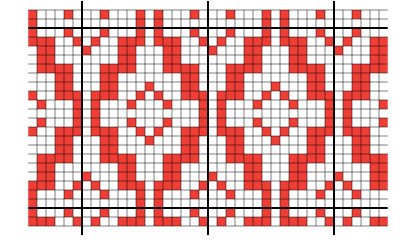
6 pattern stitches on each side fill in the extra sts
As you can see from the image, the edges of the pattern aren’t identical. This might not bother you, and if it doesn’t, you can start knitting from this expanded pattern.
If you would like the edges to be the same, you need to examine why they are different. In this case, the partial pattern on the left includes two stitches from the smaller V in the middle of the large diamond, while the right-hand partial pattern includes only one. To fix this, we need to either remove one stitch from the project’s directions (so the cover would be 39 sts wide, and a bit smaller) or add a stitch (for 41 sts, and a slightly larger cover).
I’ve chosen to make the cover a bit larger, and added one stitch. Here is the final pattern on 41 stitches.
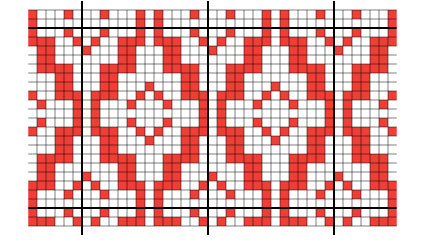
One more st added on the right, to balance the pattern.
To Make Up the Cover:
Work two identical pieces, each 41 sts by 10” long. Wrong sides together, sew together on three sides. (you can choose to leave a long or short side open).
Work the edging of your choice along the un-sewn edge. I like single crochet. Add a loop in the middle of the opening, and sew a button to the other side.